Stories take many forms: spoken word, written word, sung melody, campfire nostalgia, drunken retellings, plucked pain, solitary screams, incomprehensible babbling, the whispered chanting that echoes deep in your soul heralding the coming of Cthulhu, and even more that defy description.
Telling a story, on the surface, is simple: take the words out of your head and bring them into the world. With writing, the medium that we as writers use to bring the story into the world (oftentimes kicking and screaming) is the page. Now, what constitutes “the page” is up to interpretation: it could be an actual paper page that you write on, or it could be a computer screen that you type words on, or it could be a microphone that you dictate words to. What all those have in common is that they all eventually make your story accessible by people who aren’t you.
Everyone’s got a different approach, and those approaches are as varied and different as the stories that they’re used to tell. I type for a living, so applications on the computer are what I’m most comfortable with. Beyond the obvious, I like to use an application called Scrivener, and today we’re gonna talk about what I use, why I use it, and what my process looks like. I hope you learn something new!
What is this Scrivener Thing
Scrivener is a program that runs on MacOS, Windows, and iOS devices. On the surface, it’s a fancy writing software that looks like it probably costs too much. What it actually is, though, is almost 20 years of experience creating the perfect writing tool for a vast array of writing styles. There’s support for the notecard people, support for the color-coding people, support for the word count mavens, and honestly so many features that I haven’t even read about them all, let alone actually found them.
Keep in mind that the “Scrivener Tutorial” document is 26,708 words long, and I made it through maybe a quarter of it before I decided I was just gonna strike out on my own and learn what I could by doing. At its core, it is a fancy writing software… but a fancy writing software that works the way you want to work.
Scene by Scene
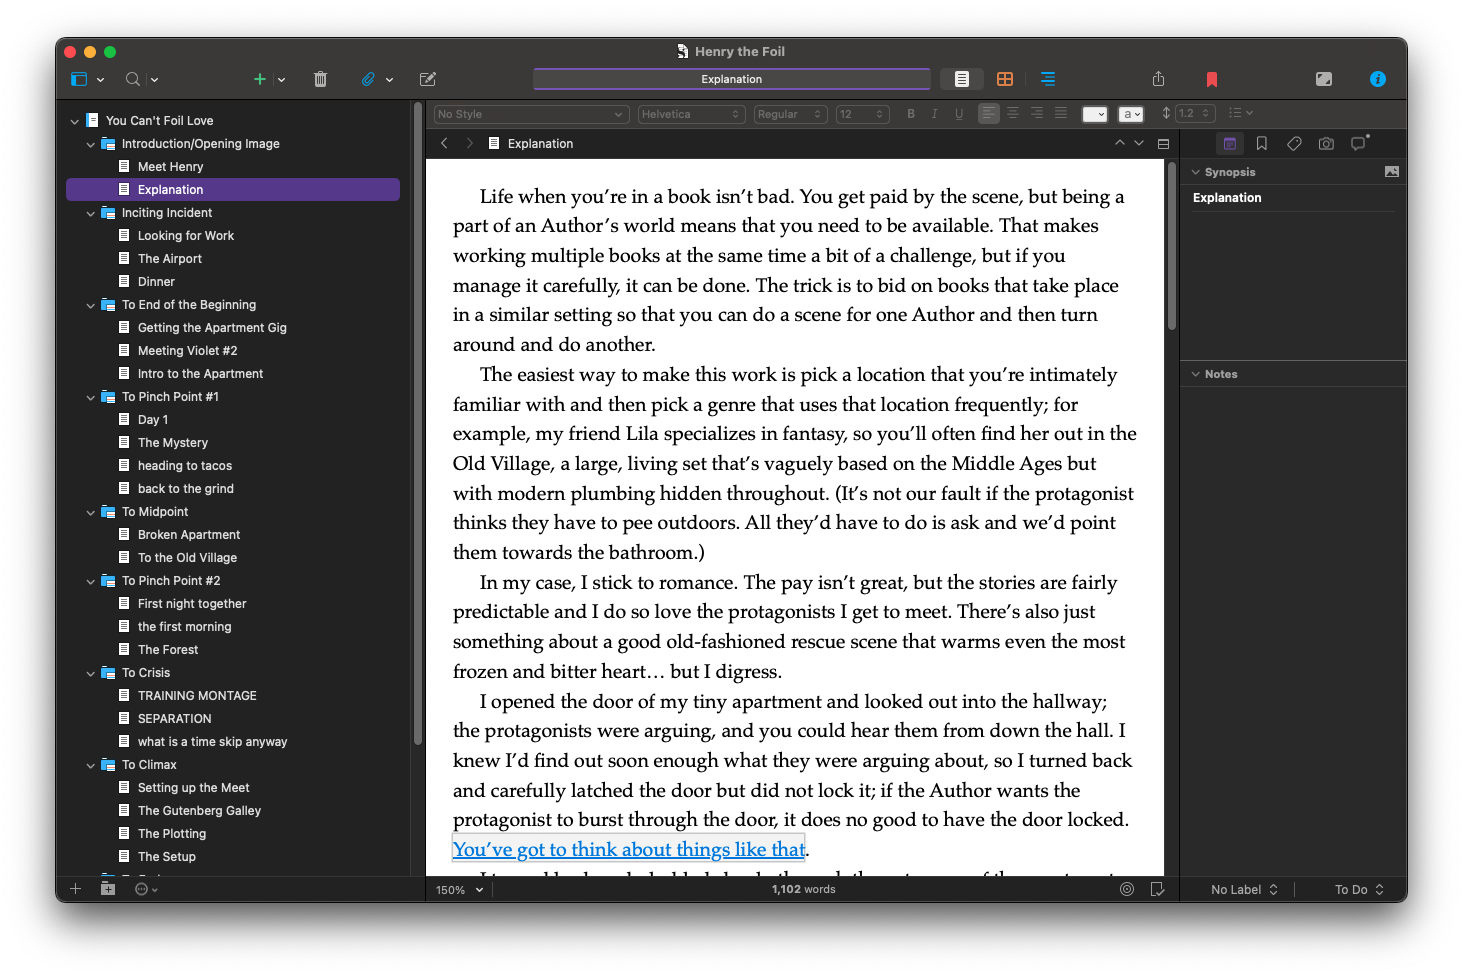
The thing that weirds out most folks when interacting with Scrivener is how content is actually arranged. Scrivener places a high emphasis on utilizing folders and ‘documents’. They’re infinitely nestable, and the top-level folder is called your Manuscript. In the tutorial, they suggest using folders for either keeping track of large separate events or using them for chapters. (When you compile a text into a book, it uses the folders as chapter separators.)
Scrivener!
Some folks recommend using a single document for a whole chapter, and I do… the opposite of that. I also don’t use folders to keep track of chapters; instead, I use them to keep track of beats.
Beat Sheets
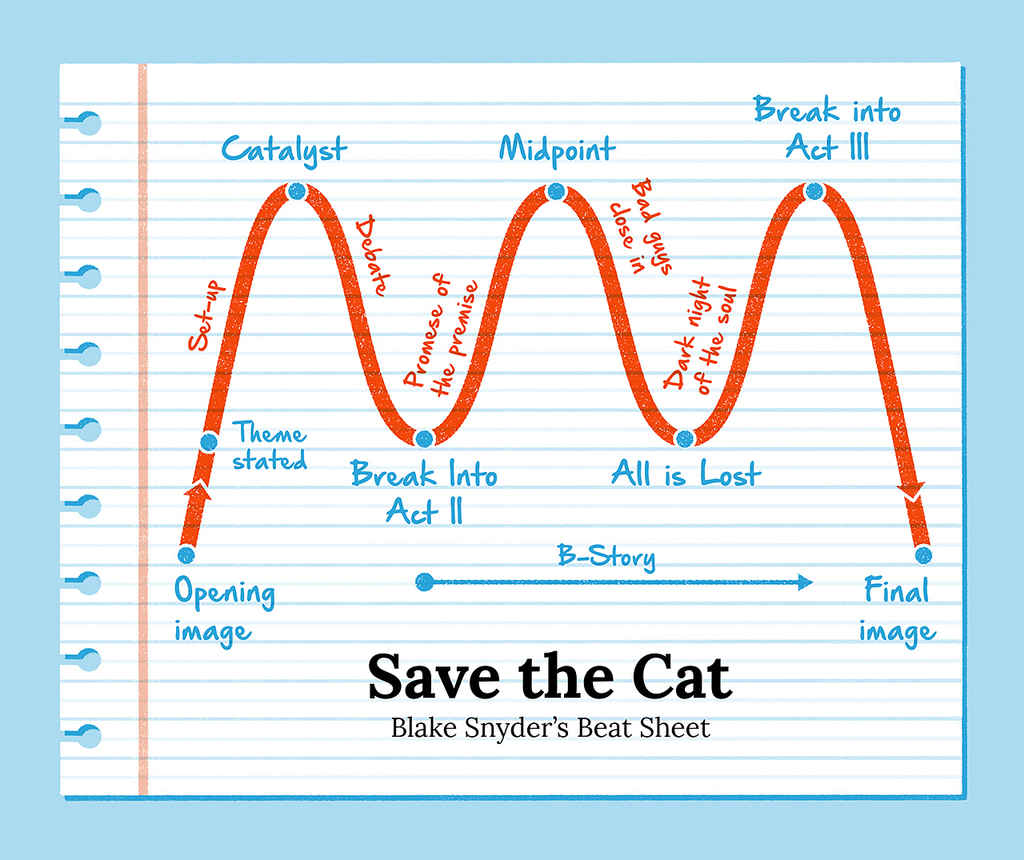
A beat sheet is a pre-written basic structure for outlines that (usually) results in a followable, if maybe sometimes a little bland, story. It offers suggestions on things like “there should be an argument here, there should be some false hope here, and there should be a realization over here”. This helps many ways:
- it gives you a scaffold around which you can build your outline
- it gives you the space to figure out details without worrying about getting lost in the story
- ensures you stay focused on resolving the larger story
Here’s an example how a beat sheet breaks down the story into its primitive blocks:
Save The Cat!
Scrivener gives you an easy way to lay out your material to make sure you’re hitting the marks you want to hit; if you take a look at the first screenshot, you’ll see that I’ve laid out the folders the the names of the beats that I’m trying to hit (in my case, I’m using Romancing the Beat from Gwen Hayes).
There are many different beat sheets or story layouts; some examples are:
- Romancing the Beat
- The Heroine’s Journey
- Save the Cat
…and many more! There are an infinite number of stories and an equally infinite number of ways to tell them, but sometimes a little guiding help isn’t a bad thing.
Keeping Track of Your Story: the Corkboard
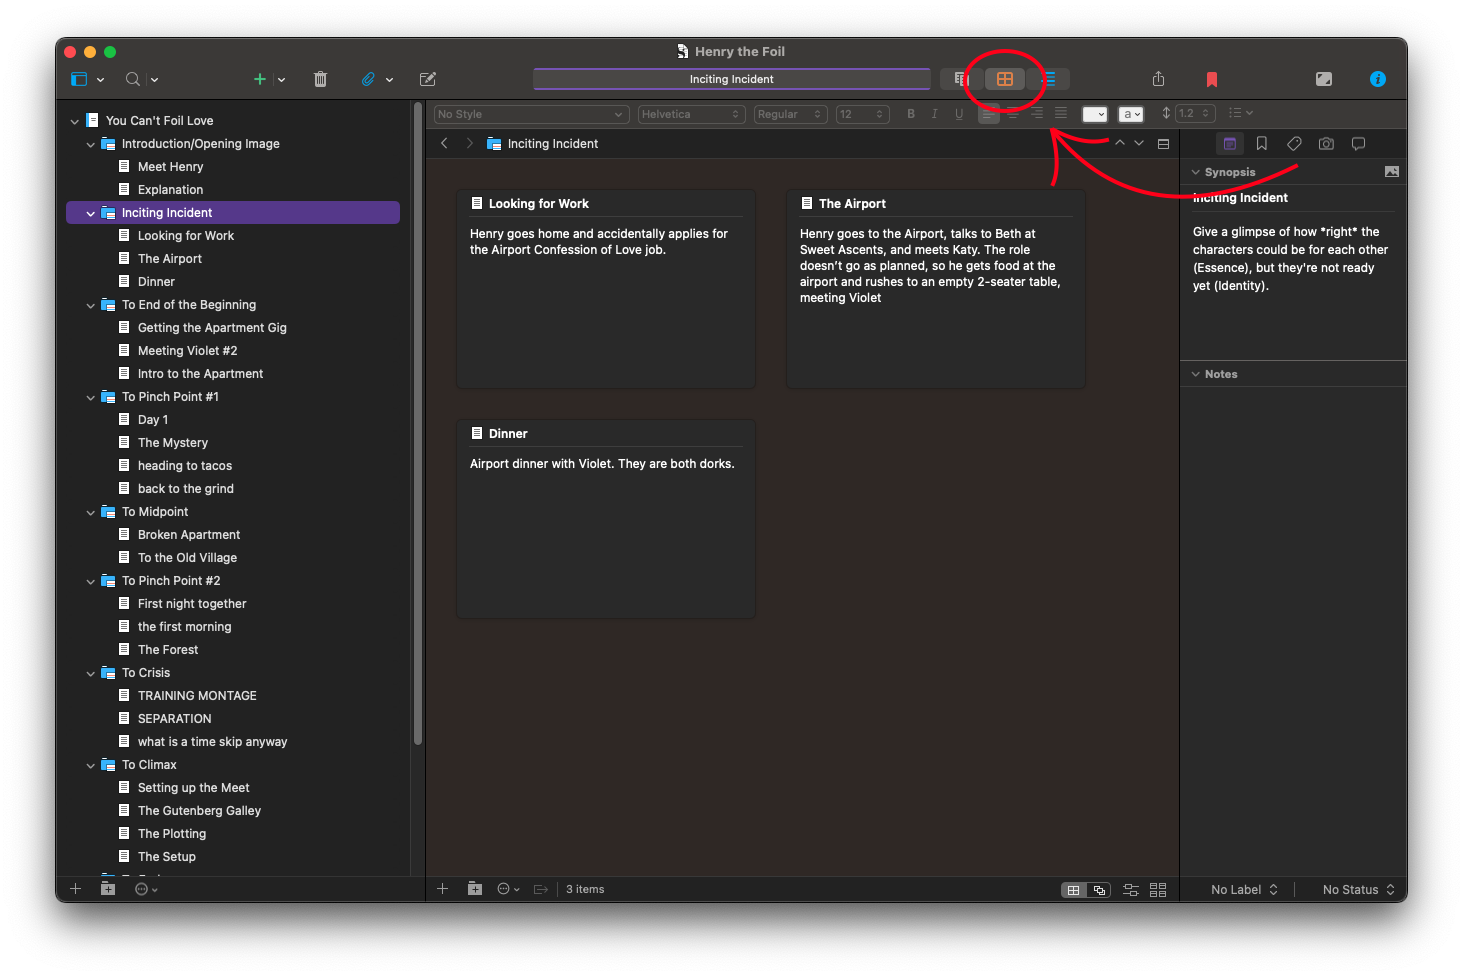
Speaking of viewing that high level information, let me introduce you to the power of the Corkboard. Imagine that you’re working with notecards, but each notecard magically has the ability to hold an unlimited number of words. Wouldn’t it be nice to move those cards around and get a better visual understanding of how your story fits together?
The Infamous Corkboard
Lucky for you, Scrivener supports this out of the box. You can access the Corkboard at any time by clicking on the button at the top of the screen, and the contents of the Corkboard change depending on what you’ve clicked on in the left-hand pane. If you click on a given story folder, you’ll see the scenes within it; if you click on your manuscript as a whole, you’ll be arranging your folders of major story content.
The Corkboard allows you to move cards around, gain a better understanding of your story, and generally let you make sure you’re staying on track. (Honestly though: do any of us actually ever stay on track?)
I use this feature religiously to lay out ideas in outline form before I actually get started. It’s so nice to be able to digitally scribble all over things without having to worry about space (or actually finding my green notecards again)!
Keeping Track of Everything Else
Every story has needs that aren’t actually the story itself: information on characters, locations, events, real life notes, and more. Scrivener builds this in by utilizing special folders that fall outside your manuscript: the Characters folder, the Places folder, and the Research folder. There is always room to organize your thoughts, and you never have to forget about a side character again or location again. I like to use this area to write down random thoughts about different characters, stash screenshots of things I think are interesting and want to reference, add web links to information I may need later, and other stuff.
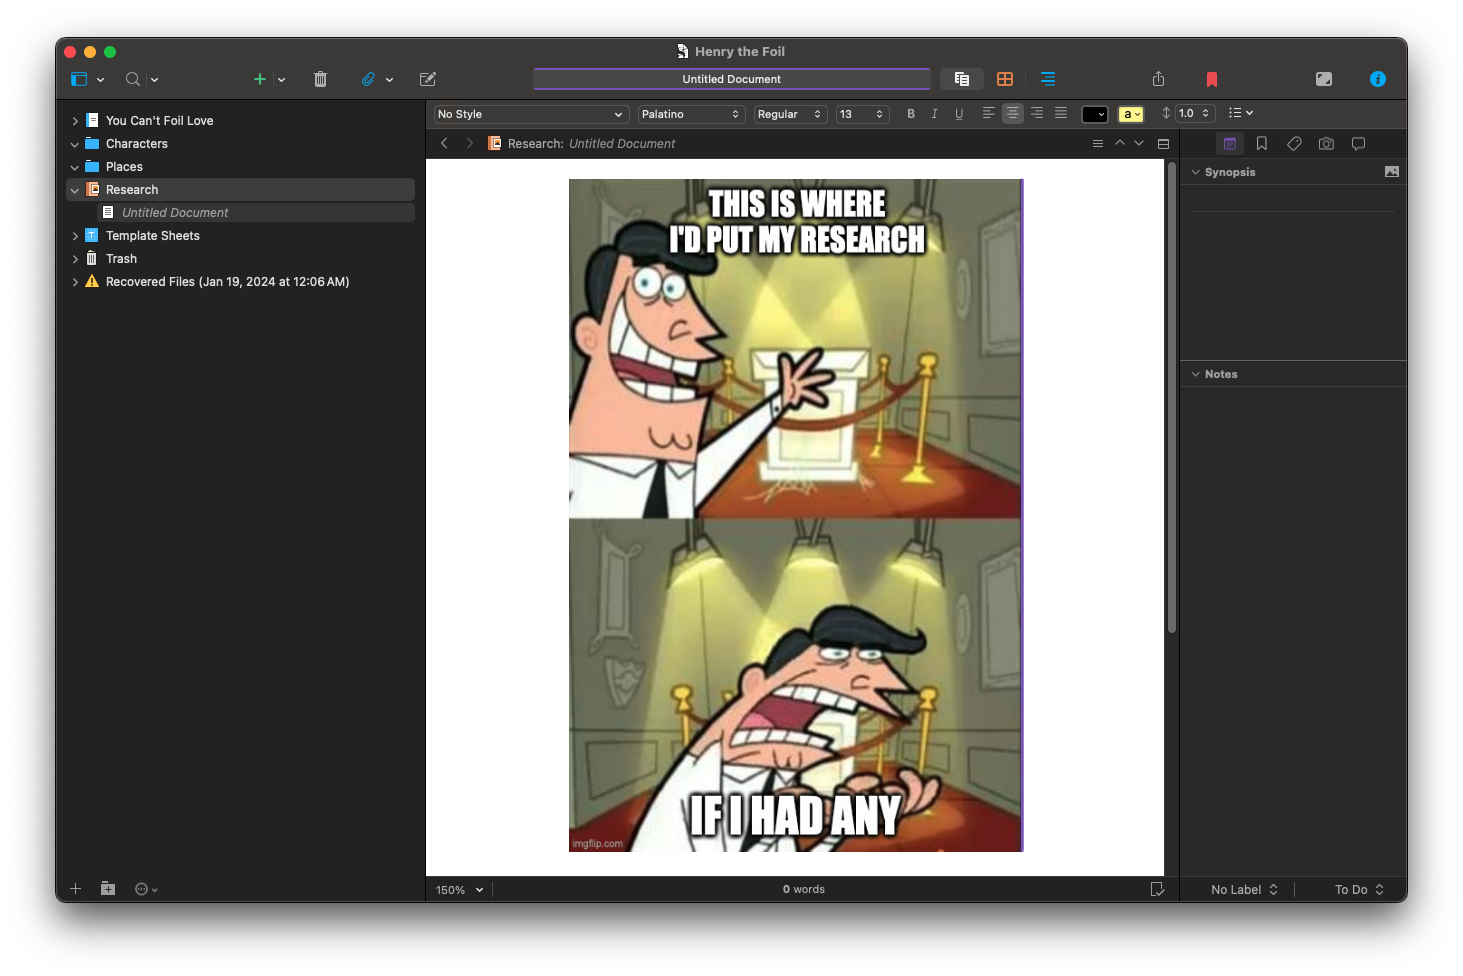
It's worth noting that I don't actually use this folder for this story, but I do use it for others. Go figure.
It’s especially useful for keeping track of room layouts and home layouts for various characters. Never lose your character’s kitchen to errant teleportation again!
Word Counts
When you’re working on any text, a common theme that appears in the form of a requirement is the word count. Scrivener allows you to set goals for your word count at the manuscript level and the folder level, allowing you to keep a close eye on how your project is coming along. Given that I like using beat sheets, I like that I can pre-calculate all the word counts for individual sections and then keep track of them as I write. This helps ensure that I hit the points that I want to hit at the right time (or reasonably close to it) and keeps the story moving.
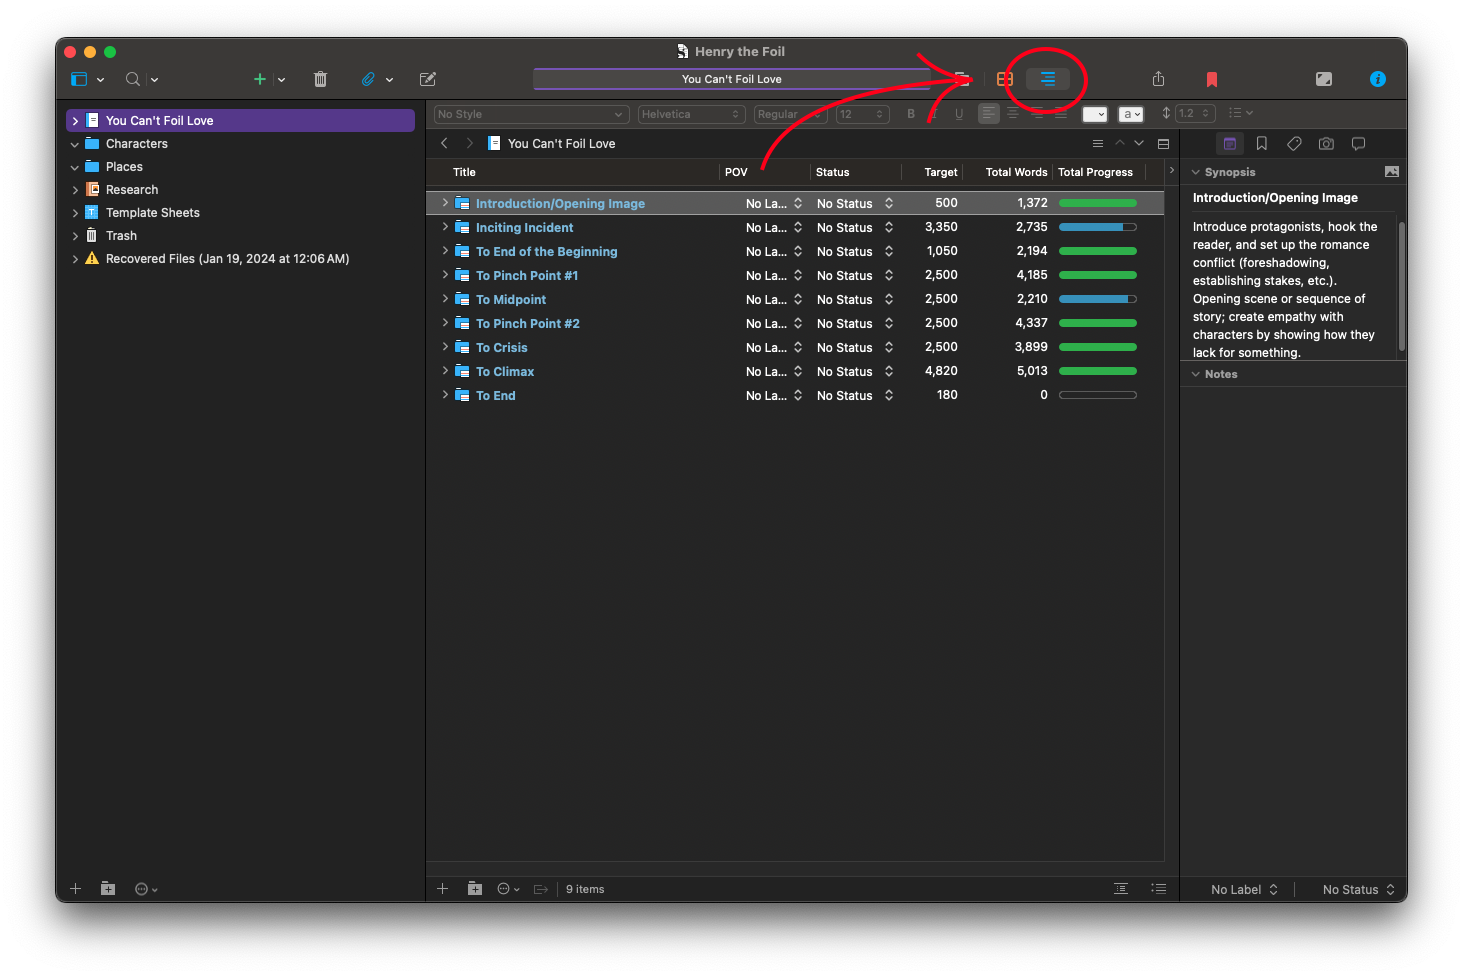
I'M SO CLOSE TO BEING DONE.
Flexibility
Though I’ve alluded to it through this, it’s worth stating definitively that Scrivener is incredibly flexible. Almost everything can be tweaked to an inch of its life, and one person’s Scrivener setup may look and operate completely differently from someone else’s. For people who just want to write, there are sensible defaults; for power users who insist on truly making it their own, there are enough toggles and drop-downs to keep them busy for a very long time.
What’s important is that you find a way to make it your own and that it works for you. It’s overwhelming at first; there’s a lot going on, but very little of it actually must be used. Mostly, it’s a framework that you can use to build the story you want to tell. If it gets in your way, something needs to change.
Conclusion
Everyone works a different way. Is Scrivener for you? Maybe it is, maybe it’s not; at the very least, you’ve seen yet another way to set it up so that it’s functional for my particular style of storytelling. Though your style may be completely different, there’s a good chance that Scrivener supports it. It’s the tool of choice for professionals all over the world; maybe it’s the tool of choice for you too. But no matter what you choose, may the force be with you.
Save the Cat graphic from Reedsy.com.